Generative Brushes Part 1

I make heavy use of ‘brushes’ in most of my generative pieces. I think they’re crucial for adding an extra dimension and a lot of texture to the piece. Below, I’ll create a simple system that you can add and customize on your projects. This technique can be customized and extended to create dry media looks from pencils to charcoal or take a completely new direction!

Note: The code samples use my own private framework. If you have some basic experience with JavaScript and p5js, it should be easy to adapt them. The variable c represents my personal drawing library, and the methods should translate to p5js almost identically. I also use several random number convenience methods, and what they do should be clear from the function name.

Start with two points and a line

The idea is to take two points and draw many little circles between them. It’s the spacing, arrangement, and color of these tiny shapes that determine the look of the final line and what media it looks like. If you have a complex shape, such as a circle, square, etc., then imagine doing this between each pair of points on that shape.

Let’s start with a basic line.

And the code. Here, I define some basic variables, set the context color, and draw the line to the canvas context.

image

The next step is to plot points along the path rather than just drawing a line. We’ll start with a dotted line, drawing a circle at each point as we step between the start and endpoints.

image
image

If you increase the variable stepsBetweenPoints you’ll end up with a more detailed line. The farther apart the start and end points are, the higher you’ll want this value. Here’s what it looks like with 100 steps.

image

Adding interest with randomness and noise

If you’ll notice, the radius of the circles is the thickness of the stroke. By using a random number as the radius, the line becomes much more interesting!

image

This looks like an erratic leaky pen. I’m using this random number utility function to get this value.

image

Let’s make it better with some noise. In this context, it’s helpful to think of noise as a smooth gradation of random values. As we get the 2d noise values of the points on our line, it travels through and noise space and gradually changes. The frequency of the noise will determine how quickly the values change. Simplex noise with a frequency of 0.005 at 1 amplitude is a very smooth place to start.

image
image

Experimenting with this simple approach can yield interesting results! Below, I’ve increased stepsBetweenPoints to 300, changed minRadius to .5, and maxRadius to 5. The result is a wavy ink line.

image

Adding texture

So what about the old-school airbrush look? For that, we need to draw random points around each of the points in our line. For a great explainer of the best way to get a uniform distribution of random points in a circle, watch this excellent video from nubDotDev. These recent tweets from Yazid and Takawo Shunsuke show several methods for point distribution in a circle. Experiment! We’ll the method below for the rest of this article.

image

Using that function to get a uniform random radius, we can pair that with random radians between 0 and two PI to draw random circles around our point, and then we have our old-school spray can.

image

The new function, randomCirclesAroundPoint, creates all of the random circles for us. Thickness is the maximum radius for the points, and density is the number of circles to draw.

image

To visually illustrate what’s going on, here’s a debug view. The green dot is our stepped point, the center of the circle. The red outline is the thickness or the max radius to create the random points.

image
image

Tweaks and ideas

At this point, you have everything needed to create a convincing natural media-drawn line in your projects. You can create a pencil line by tweaking all of the variables we’ve covered so far.

image

One tip, is to use alpha on the circle’s fill color. Below is that line again, but with a fill alpha of 0.25.

image

Below, I’ve increased the alpha to 0.5, and changed the min/max radius of the circles to 0.25 and 1. With circles sizes this small, you’ll need to increase the density quite a bit, but the results are even better.

image

Scaling up the thickness of the line, you can create a charcoal effect.

image

Another trick I’ve used in my work is to snap about 30% of the circles to a multiple of a whole number. This will give the feeling of the media sticking to a paper or canvas grain. Below, 30% of the circles in the randomCirclesAroundPoint function are snapped to an x or y value that’s a multiple of 3.

image

The effect is subtle, but it adds more realistic details. Here’s the updated code with this included.

image

For more complex polygons, like an arc, circle, or square, where the points are close together, the stepsBetweenPoints needs be very low – even 1 in some cases. In my projects, I have all of this wrapped in a function that takes an array of points and the steps, thickness, density, sizes, etc., as options.

Be careful as you start to use this technique in your projects. Drawing too many circles will have a negative performance hit. Experiment with the stepsBetweenPoints and thickness vs density variables. You only need enough to get a convincing look. The closer the points are, the less steps you need between the points. The thinner the line, the less density you need. It’s a good idea to create a function that will lerp these values for you.

I’ve spent a lot of time hunting down performance bottlenecks for it to be a low alpha and very high steps and density. Increasing the alpha let me reduce the other variables and didn’t have a negative impact on the appearance.

A complete function

Below is an example of how this could look in your projects. I’ve taken this code, placed all of the tweaking variables in an object, added checks for different options values, and made it reusable. This is similar to how it looks in my own projects.

Using an object to store and pass the variables makes it easy to change up the looks. You can have one for a pencil, another for charcoal, etc.

const drawLine = (x1, y1, x2, y2, options = {}) => {
    // options defaults, a pencil line
    const {
        stepsBetweenPoints = 10,
        density = 5,
        minThickness = 0.1,
        maxThickness = 2,
        minRadius = 0.25,
        maxRadius = 1,
        noiseFrequency = 0,
        snapPointsPx = 3,
        snapPoinstPct = 0.7,
    } = options;

    const xIncrement = (x2 - x1) / stepsBetweenPoints;
    const yIncrement = (y2 - y1) / stepsBetweenPoints;

    let currentX = x1;
    let currentY = y1;

    // Creates a function that takes x,y as arguments and returns a value from -1 to 1
    // if noiseFrequency === 0 then, it won't be used
    const noiseFn = basicSimplex(noiseFrequency);

    const randomCirclesAroundPoint = (centerX, centerY, thickness, density) => {
        for (let i = 0; i < density; i++) {
            const rndRadius = randomNumberBetweenSq(0, thickness);
            const rndRadians = randomNumberBetween(0, Math.PI * 2);
            let x = centerX + rndRadius * Math.cos(rndRadians);
            let y = centerY + rndRadius * Math.sin(rndRadians);
            const pointRadius = randomNumberBetween(minRadius, maxRadius);

            if (snapPoinstPct && snapPoinstPct < 1) {
                if (randomNumberBetween(0, 1) > snapPoinstPct) x = snapNumber(snapPointsPx, x);
                if (randomNumberBetween(0, 1) > snapPoinstPct) y = snapNumber(snapPointsPx, y);
            }

            c.circle(x, y, pointRadius);
        }
    };

    for (let i = 0; i < stepsBetweenPoints; i++) {
        let rad;
        if (noiseFrequency) {
            rad = (Math.abs(noiseFn(currentX, currentY)) + minThickness) * maxThickness;
        } else {
            rad = randomNumberBetween(minThickness, maxThickness);
        }
        const thickness = rad;
        randomCirclesAroundPoint(currentX, currentY, thickness, density);
        currentX += xIncrement;
        currentY += yIncrement;
    }
};

const draw = () => {
    c.noStroke();

    // slant the lines
    const xOffset = 30;

    // bounds on the color so it's not too dark or light
    const minColor = 50;
    const maxColor = 150;

    // vary the thickness of the lines
    let minOffset = 0;
    let maxOffset = 0;
    const thicknessOffsetStep = 0.05;

    for (let x = 0; x < canvasWidth; x += 15) {
        const r = randomNumberBetween(minColor, maxColor);
        const g = randomNumberBetween(minColor, maxColor);
        const b = randomNumberBetween(minColor, maxColor);
        c.fill(`rgb(${r},${g},${b})`);

        drawLine(x - xOffset, 0, x + xOffset, canvasHeight, {
            stepsBetweenPoints: canvasHeight,
            density: 20,
            noiseFrequency: 0,
            minThickness: 1 + minOffset,
            maxThickness: 3 + maxOffset,
            snapPoinstPct: 0,
        });

        minOffset += thicknessOffsetStep;
        maxOffset += thicknessOffsetStep;
    }
};

I’ll end this article here and continue with simulating paint in a future one. I hope this has given you new ideas and areas to explore in your work!

Please give me a follow on Twitter @nudoru and Instagram @hfaze! If you use this in a project, give me a shout, I’d love to see what you make!

Airdropping on fx(hash): Tips and Tricks

By Nudoru and Abstractment

So, you have an awesome gentk on fx(hash)! Congratulations! Now you want to send copies to your supporters and fans? Here’s our quick guide on how to do it.

The end goal is to get a CSV file that we can drop into http://batch.xtz.tools and have it do the work of passing out our tokens for us. 

The CSV we’ll want to use for the batch tools site needs 3 columns: wallet IDs, fx(hash) token IDs, and quantity (1 for one per wallet). We’ve gone ahead and created this template for you to make it as easy as possible. When you click this link, it’ll require you to create a copy so that it’s your own unique copy.

Step 1 – Mint your tokens

This is the most manual and time-consuming part of the process. You need to manually mint each token that you want to airdrop. Put on a good show or some tunes to keep you occupied. Keep in mind that your transactions will fail if you try to process more than one mint within a single block. A good baseline is to wait 30 seconds between each mint or just wait for the confirmation to show on the fx(hash) page.  You can also track the Tezos blocks here if you want to move quickly. Once you’re done and they’re all signed by fx(hash), you may want to clear/refresh the metadata in your wallet so that the names and thumbnails are updated.

Step 2 – Get the token IDs

Go to your project’s page on this site: https://fxfam.xyz/YOUR_PROJECT_ID. Thanks to @zancan for creating this resource. This site uses the fx(hash) API to display a list of minted editions and the owner. We want to scrape the list of the tokens we minted from this site. 

Open up the JavaScript console and paste this script to the console.  Before hitting enter, change YOUR_fx(hash)_ID to your fx(hash) username on the fourth line of code.

let a=[]; 
document.querySelectorAll('li.token').forEach((e,i) => {
let o = e.querySelector('div.owner').innerText;
if(o === 'YOUR_fx(hash)_ID') {
let lnk = e.querySelector('div.inner a');
a.push(`${lnk.href}\n`)}}); 
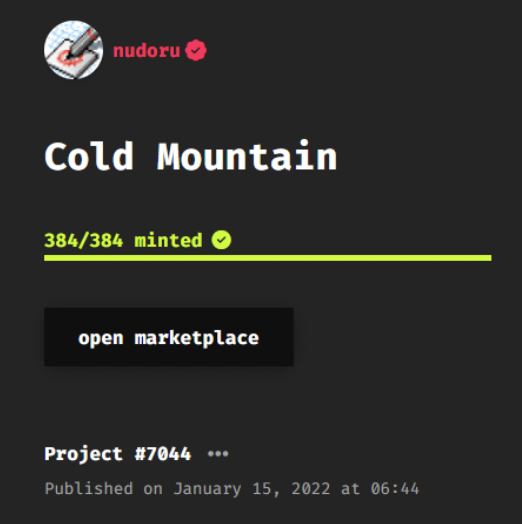
console.log(a.join(''));

As an example, the project ID is 7044 in this sample below.

Voila!  Now you’ll see a list of all of the tokens you hold for this collection.  Copy and paste this list to column A on tab 2 of the Google sheet. We just need the ID number of each mint, and the google sheet will automate extracting this for you.

Note: Sometimes it doesn’t load all of the editions and you’ll need to refresh the page. Make sure that all editions have loaded before pasting the script for this step.

Step 3 – Get the list of lucky wallets

How you determine which wallets will receive an airdrop is up to you, you just need a list of them for column A of our sheet. Use tab 3 in the google sheet for these steps.

If you want to use the owners of previous projects:

  • Visit your project on https://fxcollectors.stroep.nl.  Shout out to @mknol for creating this. 
  • Enter your project ID and hit enter.  
  • Click the Owners tab. This entire page is sorted by the number of pieces in the wallet. Scroll to the very bottom of the page and you’ll find a text area of wallet addresses. This list is ordered by the number of pieces in the wallet, so if you want to airdrop to just holders of a specific number of pieces, you can compare the first on this page to determine where to cut it off.
  • Copy and paste the wallet addresses to column A of tab 3 in the Google sheet. Note: In a recent update, the number of editions is after the wallet addresses. You’ll need to manually remove this in the Google sheet.
  • You can pull wallets from multiple projects, just keep copying and pasting to the bottom of the list in the sheet.
    • If you want to remove duplicate wallets so that everyone only gets 1 airdrop, do the following: In Google sheets, select column A, then Data menu > Data cleanup > Remove duplicates.
  • How do you want to assign tokens to the wallets?  
    • Want your largest holders to get lower numbered editions?  If so, you’re done.  
    • Want everything randomized? Shuffle the list: With column A still selected, Data menu > Randomize range. Do this as many times as you want, but I usually do it 3 times for a good shuffle. 
    • Want to pick and choose which wallet gets which pieces?  Just put them in the order that you want and confirm they match on the first tab.

Step 4 – Double-check the sheet

Now, in the first tab (_final for CSV), you should have a Google sheet with 3 columns: a list of wallets, a list of your minted IDs, and a 1 beside each in column C. Make sure all of the data matches up and that columns A and C are the same lengths as column B. 

Export the list: File > Download > Comma Separated Values (.csv).  Open up your CSV to confirm you have just one tab with three columns.

Step 5 – Airdrops!

Now for some magic, thanks to the work of @pureSpider.  

  • Go to http://batch.xtz.tools and connect your wallet. 
  • Pick “fx(hash) 1.0” in the FA2 Contract drop down.
  • Upload or paste the CSV file.
  • Do a quick double-check of the data.
  • Click Send Transaction, and approve the transaction through your wallet. In a few minutes, you’ll see all of the transactions sent.